Raising Your Own Mealworm Farm: The Honest Guide
Published on: February 11, 2026 | Last Updated: February 11, 2026
Written By: Alexander 'Gecko Geek' Johnson
You want to provide your geckos with the best, most nutritious feeders, but the constant trips to the pet store and the rising costs are starting to feel like a second job. I’ve been there, staring at my gecko Jeter while my wallet groaned. That’s exactly what led me to start my own mealworm colony years ago.
Let me help you cut through the hype and see the full picture. We’ll break down the key takeaways so you can decide if this project is right for you.
- You can save significant money on feeder insects over time.
- You gain total control over your gecko’s food quality and gut-loading.
- It requires an initial setup and consistent, albeit simple, maintenance.
By the end of this, you’ll have a crystal-clear, no-nonsense view of what it really takes. We’ll cover the pros, the cons, the startup costs, the time commitment, and the potential for mess and smell. Let’s dig in.
The Big Benefits: Why You Should Start a Mealworm Farm
Watching my geckos, like the ever-hungry Babe, pounce on a wiggling worm never gets old. Raising your own feeders transforms you from a simple buyer into a true, self-sufficient gecko steward. The perks go far beyond just the fun of it — it also helps encourage natural foraging behavior in your gecko.
Massive Cost Savings
Buying cups of mealworms every week adds up shockingly fast. A single, small initial investment in a colony can provide a near-endless supply. My homegrown worms have saved me hundreds of dollars a year, money I can spend on better terrarium plants or vet check-ups.
Unbeatable Nutritional Quality
You control what your feeders eat, which means you control what your gecko eats. I “gut-load” my worms with high-calcium veggies and specialized diets 24 hours before feeding. This process creates a vitamin-packed power snack that store-bought worms simply can’t match. Leopard geckos rely on live insects for nourishment, so providing gut-loaded prey is essential for proper nutrition. It’s the best way to ensure your pet gets the nutrients they need.
Ultimate Convenience
It’s 10 PM and you realize you’re out of feeders. No panic. No emergency pet store run. Your personal insect pantry is just a few feet away, ready for action. The best time to feed your leopard gecko is in the evening, when they’re most active. Keeping to that evening feeding window is easier with quick access to your pantry. This consistent access is a game-changer for busy gecko owners.
You Know Their History
You have zero doubts about pesticides, parasites, or how the feeders were treated. This peace of mind, knowing exactly what you’re handing to a trusting creature like my calm Jeter, is absolutely priceless.
The Honest Drawbacks: Challenges of Home Mealworm Farming
Let’s be real. It’s not all sunshine and happy geckos. Ignoring the downsides is a fast track to a smelly failure and a lot of wasted effort. I’ve made these mistakes so you don’t have to. To help you get off on the right foot, I’ve broken down 15 critical mistakes new leopard gecko owners make and how to avoid them.
The “Eww” Factor and Odor Management
You are keeping a box of insects. It can smell, especially if you get lazy with cleaning. A neglected farm produces a distinct, sour odor that will absolutely permeate a room if you don’t stay on top of maintenance. You must be comfortable with handling worms and beetles regularly.
It Demands Your Time
This isn’t a “set it and forget it” project. Your farm needs weekly attention. My weekly chore list looks like this:
- Sifting out frass (worm waste)
- Harvesting the mature worms
- Adding fresh vegetables for moisture
- Checking for and removing dead beetles
If your schedule is already packed, this can feel like one more burdensome chore.
The Space and Setup Commitment
You need a dedicated, out-of-the-way space for your farm. A simple tub works, but it can’t be in direct sunlight or a cold draft. Finding that perfect spot in your home-warm, dark, and not in your kitchen-is a crucial first step many overlook.
Potential for Pests and Escapes
Grain mites can infest your farm, and the occasional beetle will inevitably find its way out. A secure lid and vigilant hygiene are your best defenses against uninvited roommates. I once found a beetle in my silverware drawer; it was a stark lesson in container security.
The Emotional Hurdle
You are raising living creatures to be food. You’ll see the full life cycle from egg to beetle. Some people find it difficult to separate the “pet” feeling from the “feeder” purpose, especially when handling the beetles. It’s a personal boundary you need to be okay with.
Setting Up Your Farm: Essential Gear and Space Needs
Starting a mealworm farm is surprisingly simple and doesn’t require a huge investment. You can get a productive colony going with just a few basic, affordable items. I keep my main farm on a simple shelf unit in my office-it’s that unobtrusive.
Your Mealworm Starter Kit
Here is the essential gear you’ll need to gather:
- Containers: Use smooth-sided plastic bins (3+ for a rotating colony). I’ve found Sterilite or Rubbermaid bins work perfectly. Smooth sides stop the worms and beetles from climbing out.
- Ventilation: Cut a large rectangle from the lid and hot-glue fine metal mesh over the opening. This is non-negotiable for air flow and keeping pests out.
- Substrate: This is their bedding and food. Use wheat bran, oat bran, or uncooked oatmeal a few inches deep.
- Hiding & Egg-Laying Spations: Provide egg cartons, cardboard tubes, or pieces of breathable cloth. The beetles need these surfaces to lay eggs.
- Moisture Source: A small, shallow lid from a jar is perfect. You’ll place moisture-rich foods here.
Space and Location
You don’t need a barn. A single small bin can fit on a closet shelf, but giving yourself room for multiple bins makes maintenance far easier. I use a three-bin system for different life stages.
- Ideal Temperature: Keep your farm in a room between 75-80°F (24-27°C). Warmer temps speed up their life cycle.
- Location Tip: Avoid direct sunlight and drafty areas. A quiet, dark cupboard or closet shelf is ideal.
Daily Care and Maintenance: Keeping Your Colony Healthy
A healthy farm is a productive farm. This routine takes me less than five minutes a day and ensures my geckos get the most nutritious feeders possible. It becomes as habitual as checking your pet’s water dish, especially when feeding juvenile versus adult geckos.
The Daily Check-In
Every day, you should quickly:
- Check the Moisture Source: Look at the veggie piece in the lid. Remove it if it’s moldy or dried out and replace it with a fresh slice of carrot, potato, or apple.
- Remove Dead Insects: Spot-check for any dead beetles or pupae and remove them promptly to prevent mold.
- Observe: A quick glance tells you if the substrate is still deep enough and if the colony looks active.
Weekly and Monthly Tasks
The key to a low-odor, pest-free farm is staying on top of waste removal. Here’s the deeper cleaning schedule I follow.
- Sifting for Frass: Every 1-2 weeks, sift the substrate through a fine kitchen strainer. This removes their droppings (called frass) and old food skins. I add fresh bran to replace what was lost.
- The Full Clean-Out: Once a month, I completely empty a bin. I wash it with a mild vinegar solution, dry it thoroughly, and add all-new substrate. This prevents mite infestations and keeps things sanitary.
- Rotating Bins: If you use a multi-bin system, you’ll be regularly moving beetles to a new “breeding” bin and harvesting worms from an older one.
Remember, a clean colony is the foundation for healthy geckos. The little bit of effort you put in pays off massively in the quality of food you’re providing for your pets. To prevent common gecko illnesses, set up a proper habitat with the right temperatures, humidity, substrate, and plenty of hiding spots. Regular cleaning and quarantining new arrivals also help keep pathogens at bay.
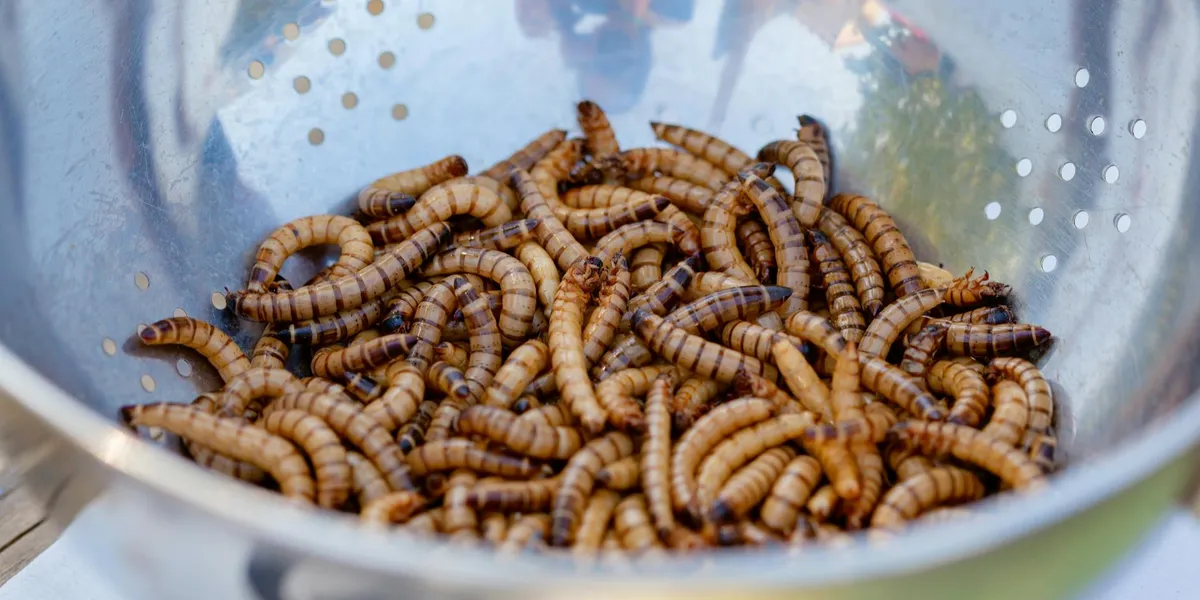
Harvesting and Feeding: From Farm to Your Gecko’s Bowl
Getting those wriggling nutrients from your farm to your gecko is a process. I’ve found a simple routine keeps everything clean and nutritious for my crew, from my energetic leopard gecko Griffey to my giant day gecko Babe. For gargoyle geckos, a complete gargoyle gecko diet feeding guide can help tailor that routine. It covers what to feed, how often, and which supplements support their health.
How to Harvest Your Mealworms
You don’t want to be digging through the substrate with your hands every time. My go-to method is using a piece of carrot or potato as a trap. Place a large slice on top of the substrate. In a few hours, a bunch of mealworms will have congregated underneath it for an easy, non-invasive collection.
Preparing the Perfect Gecko Snack
Never feed a mealworm directly from the farm to your gecko. They need a little spa treatment first!
- Separate: Move the number of worms you need into a temporary holding container.
- Gut-Load: This is the most important step! Feed these worms a highly nutritious “gut-load” diet for at least 24 hours before offering them. I use a mix of high-quality commercial gut-load food, slices of squash, and bits of leafy greens.
- Dust: Right before feeding, gently roll the worms in a calcium or calcium + D3 supplement powder. This ensures your gecko gets the vital nutrients it needs for strong bones.
Which Mealworms to Pick
Not all worms are created equal for feeding time.
- Freshly Molted Worms: These are white and softer. They are easier for younger or smaller geckos to digest and are often more enticing.
- Standard Sized Worms: Match the worm size to the space between your gecko’s eyes. This is a good rule of thumb to prevent choking or impaction.
- Avoid Dark Pupae: Geckos can eat pupae, but they are often less nutritious and not as exciting for your pet. I usually let mine turn into beetles to continue the colony cycle.
Troubleshooting Common Problems in Mealworm Farming
Even the best-run farms can hit a snag. I’ve dealt with my share of funky smells and unexpected mites. Catching these issues early is the key to saving your entire colony.
Dealing with Pests: Mites and Grain Weevils
If you see tiny, fast-moving specks that aren’t your mealworms, you likely have mites. Grain weevils are small, dark beetles.
- Immediate Action: Isolate the infected container immediately to prevent spread.
- The Potato Trick: Place a potato slice in the bin. Mites will swarm to it, and you can remove and dispose of it every few hours.
- Prevention: Always freeze new oats or wheat bran for at least 48 hours before using it to kill any unseen eggs or larvae. Keep the farm in a dry area.
Controlling Mold and Foul Odors
A healthy farm should smell like oats, not a locker room. A foul smell means something is wrong.
- Cause: This is almost always due to excess moisture and rotting vegetables.
- Solution: Remove all fresh food after 24-48 hours if it hasn’t been eaten. I stick to harder vegetables like carrots and potatoes that take longer to rot. If mold appears, scoop out the affected substrate and a large area around it immediately.
- Increase Ventilation: Make sure your container lid has adequate holes for air exchange.
Managing the Beetle Population
It’s easy to end up with a beetle explosion, which can overcrowd your farm and deplete food rapidly.
I keep a separate “beetle bin” where I move all pupae. Once they hatch into beetles, they stay in that bin to lay eggs. After a week or two, I move the beetles to a second beetle bin, leaving the first one to hatch out thousands of baby mealworms. This rotation system gives you control and a continuous, manageable supply.
FAQs
How long does it take for mealworms to mature from eggs to harvestable size?
It typically takes about 4 to 6 weeks for mealworms to develop from eggs to a size suitable for feeding most geckos, unlike some other options like hornworms.
Can I use the same mealworm farm for feeding other pets, like birds or fish?
Yes, the mealworms you raise can be safely fed to a variety of insectivorous pets, including birds and fish, as long as they are appropriately sized and gut-loaded.
What is the best way to store excess mealworms if I have more than I need?
You can store surplus mealworms in the refrigerator to slow their metabolism and keep them fresh for several weeks without significant loss in quality.
The Final Verdict on Mealworm Farming
Raising your own mealworms is a fantastic way to save money and provide a constant, nutritious food source for geckos like my leopard gecko, Griffey. The ultimate choice boils down to a simple trade-off: your willingness to manage a small, ongoing project versus the long-term savings and convenience it provides. If you have the space and a few minutes each week for maintenance, the setup cost is a worthwhile investment in your pet’s diet. To do this properly, you’ll want to learn how to care for and feed mealworms to your gecko. Keep the colony clean, gut-load the worms with nutritious foods, and feed only appropriately sized worms.
Remember, a mealworm farm is a tool for better gecko care, not the entirety of it. Your commitment to learning about all aspects of your gecko’s health—from habitat to handling—is what truly defines excellent pet ownership. When it comes to feeding, refer to a complete feeding guide tailored to your gecko species to ensure you’re meeting its nutritional needs. Different species have different preferences and requirements, so a species-specific plan is essential. Keep observing, keep asking questions, and your scaly friend will thrive under your dedicated care.
Further Reading & Sources
- How To Start A Mealworm Farm: A Comprehensive Guide For Beginners – Heritage Acres Market LLC
- How to Raise Mealworms: 15 Steps (with Pictures) – wikiHow
- Mealworm Farm : 11 Steps (with Pictures) – Instructables
The Gecko Guide is your ultimate resource for gecko enthusiasts, providing expert advice and practical tips to ensure the health and happiness of your scaly companions. Alexander is a passionate gecko owner with over a decade of experience in reptile care. We are dedicated to offering accurate, up-to-date information to support your gecko journey.Our mission is to foster a community of responsible gecko owners who are passionate about the well-being of these fascinating creatures.
Live Food