Automate Your Gecko’s Habitat: A Guide to Timers, Thermostats, and Misters
Published on: February 18, 2026 | Last Updated: February 18, 2026
Written By: Alexander 'Gecko Geek' Johnson
Are you tired of constantly checking temperatures, turning lights on and off, and worrying if your gecko’s home is perfect while you’re away? I’ve been there, fussing over my crestie Jeter’s tank before a weekend trip. Manual care is a recipe for stress-for you and your pet.
Automating your gecko’s enclosure is the single best upgrade for your peace of mind and their consistent health. I’ll help you understand the simple, affordable gear that does the heavy lifting for you. You’ll learn:
- How to create a perfect, hands-off day/night cycle for your gecko.
- The critical difference between a simple timer and a life-saving thermostat.
- Why an automated mister can be a game-changer for humidity-loving species.
You’ll get clear, step-by-step advice based on my years of keeping everything from leopard geckos to day geckos. This guide covers: timers for lighting, thermostats for heat, and misting systems for humidity.
Why Automate Your Gecko’s Home?
I used to wake up every morning and scramble to turn on heat lamps and mist enclosures. It was a stressful routine. Then I automated my geckos’ homes, and it changed everything for me and my pets. Automation creates a stable, hands-off environment that mimics the consistent rhythms of nature, which is exactly what our geckos need to thrive.
My crested gecko, Jeter, used to have occasional stuck shed on his toes before I got a mister. That problem vanished completely with consistent humidity. Here are the biggest benefits you will see.
- Perfect Consistency: Thermostats and timers never forget. Your gecko gets the right temperature and light cycle, day in and day out.
- Improved Gecko Health: Stable conditions prevent respiratory infections, shedding problems, and digestive issues caused by fluctuating heat and humidity.
- Massive Time Savings: Automating your chores gives you more time to enjoy watching your pet instead of just maintaining its home.
- Peace of Mind: You can leave for the day, or even a weekend, knowing your gecko’s essential needs are being met automatically.
- Prevents Accidents: A good thermostat will shut off a heat lamp that gets too hot, protecting your gecko from burns and preventing a potential fire.
Picking the Right Automation Gear for Your Gecko
Walking into a pet store can be overwhelming. You do not need every gadget, just the right ones for your specific gecko. The best automation setup depends entirely on your gecko’s species and the size of its enclosure. What works for my leopard gecko would be a disaster for my crested gecko.
Use this simple guide to match the gear to your gecko.
| Gecko Species | Timer Needs | Thermostat Needs | Mister Needs |
|---|---|---|---|
| Leopard Gecko & African Fat-Tailed Gecko | Critical for day/night heat lamp cycle. | On/Off or Dimming thermostat for under-tank heater. | Not usually needed; a humid hide is sufficient. |
| Crested Gecko & Gargoyle Gecko | Important for plant grow lights or low-level UVB. | Often not needed for ambient heat; probe placement is key if used. | Essential for maintaining high nighttime humidity. |
| Day Gecko | Critical for basking lamp and UVB light cycle. | Dimming thermostat for basking lamp is a must. | Very helpful for maintaining moderate humidity levels. |
Choosing Timers for Light and Heat Control
Your gecko’s internal clock relies on a consistent day and night cycle. Geckos need a regular day-night cue to regulate their circadian rhythm. I use timers for all my heat and UVB lights. A regular, predictable light schedule helps geckos stay alert and healthy. A simple, plug-in digital timer is the most reliable and cost-effective tool you can buy for your gecko’s health. I learned this after my leopard gecko, Griffey, became lethargic from my inconsistent light schedule.
You have two main choices.
- Simple Dial Timers: These are cheap and easy to set. You push down pins for “on” times and they rotate on a 24-hour cycle. They work, but they can be less precise.
- Digital Timers: These are my go-to. You can program them to the exact minute and they often have battery backups. I use them for my cresteds’ plant lights and my day gecko Babe’s basking lamp. The precision is worth the few extra dollars.
Set your timer for a 12-hour on and 12-hour off cycle to simulate a natural day. No light or heat should be on at night for most species.
Selecting Thermostats for Safe Temperature
This is the most important safety device in your enclosure. An unregulated heat mat or lamp can seriously injure your gecko. I learned this the hard way years ago with a different gecko before I knew better. A thermostat is non-negotiable for any dedicated heat source; it is the difference between a cozy basking spot and a dangerous burn risk. When selecting the best thermostat gecko heating equipment, prioritize precise control, reliable calibration, and built-in safety shutoffs. Choose models that match your heat source and enclosure size for steady, safe temperatures.
There are two types you will encounter.
- On/Off Thermostat: This is the basic model. It cuts power completely when the temperature gets too high and turns it back on when it drops. It is perfect for heat mats under the tank.
- Dimming Thermostat: This is the premium choice for heat lamps. Instead of turning the lamp on and off, it gradually dims the bulb to maintain a steady temperature. This prevents those annoying temperature swings and extends the life of your bulb.
Always place the thermostat probe right where your gecko basks or sits to get an accurate reading of the temperature it is actually experiencing. This helps you create a perfect temperature gradient in the enclosure, offering warm basking spots and cooler retreat areas. A well-designed gradient supports natural thermoregulation and overall health.
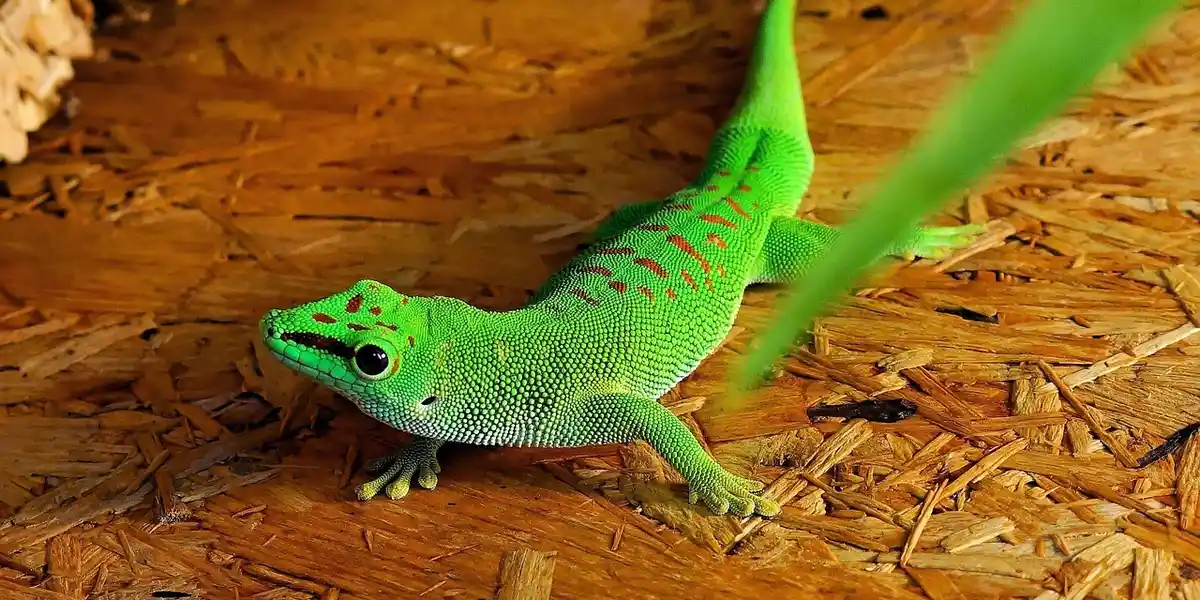
Finding Misters for Humidity Control
For my tropical geckos like Jeter and Mookie, a mister is a lifesaver. It creates the humidity spike they need to breathe properly and shed their skin. An automated misting system ensures that late nights or busy mornings never result in a dangerously dry tank. My gargoyle gecko, Mookie, is far more active and vibrant since I stopped manual misting.
Look for a system with an adjustable nozzle and programmable timer. You can set it to mist for 15-30 seconds right after the lights go out, which is when humidity should peak. For a single enclosure, a compact single-nozzle system is perfect. For larger tanks or multiple cages, you will need a multi-nozzle pump.
Do not forget maintenance. I clean my mister’s nozzle and water reservoir with vinegar once a month to prevent mineral buildup and bacteria. Stagnant water is a recipe for trouble.
Setting Up Your Automation System Step-by-Step
I remember the first time I tried to automate Griffey’s tank-I fumbled with cords and settings for hours. Taking it one device at a time saves you from overwhelm and ensures each part works perfectly for your gecko. Let’s break it down into manageable steps.
Installing and Programming Timers
Start with timers because they control the basics like light and heat cycles. Using a timer for your gecko’s lights mimics the sun rising and setting, which reduces stress and supports their natural behaviors. Lighting temperature influences gecko activity and comfort. Getting these cues right helps support natural activity patterns. Here’s how I set it up for my high-energy leopard gecko, Griffey:
- Plug your heat lamp or UVB light into the timer, then plug the timer into the wall outlet.
- Press the “set” button and use the dial or digital interface to program on/off times-I set Griffey’s light to turn on at 7 AM and off at 7 PM to match a 12-hour day cycle.
- Test the timer by manually advancing the clock to ensure it switches at the right moments.
- For a more natural feel, some timers allow gradual dimming; if yours doesn’t, just stick to consistent on/off times to avoid startling your pet.
When I first programmed Griffey’s timer, he began basking right on cue, like he was waiting for his daily “photo shoot.” Consistency here helps gecko’s internal clocks stay in sync, making them more active and healthy.
Connecting Thermostats and Sensors
Thermostats are non-negotiable for safety—I learned this after A-Rod’s enclosure got too warm one day. Accurate temperature control prevents burns, dehydration, and digestive issues in geckos. For crested geckos, the ideal temperature range is about 72-78°F by day and 66-72°F at night. Keeping within this range supports health and activity. Follow these steps to get it right:
- Place the thermostat probe in the warmest part of the enclosure, usually under the heat lamp, but not directly touching the bulb or gecko.
- Set the temperature range based on your gecko’s species-for A-Rod’s African fat-tailed gecko needs, I keep it between 88-92°F on the warm side and 75-80°F on the cool side.
- Calibrate the thermostat by comparing it with a separate thermometer; I do this monthly to avoid drift.
- Plug the heat source into the thermostat, and the thermostat into the wall, then monitor for a day to ensure it holds steady.
A-Rod rearranges his décor less now that the temps are stable-it’s like he finally approves of my setup. Always double-check probe placement; even a small shift can lead to dangerous temperature swings.
Configuring Misters and Humidity Sensors
Humidity control can be tricky, especially with species like Jeter, my crested gecko, who thrives in moist environments. Setting up a mister with a humidity sensor helps prevent skin shedding problems and respiratory issues. Creating the perfect habitat humidity makes gecko shedding easier to manage. It’s a simple balance of moisture and airflow. Here’s my method:
- Position the mister nozzle above the enclosure, aiming for a fine mist that covers plants and hides without soaking the substrate.
- Place the humidity sensor on the cool side of the tank to get an accurate average reading-I avoid direct spray to prevent false highs.
- Program the mister to run for short bursts, like 10-15 seconds, 2-3 times a day, and set the humidity sensor to trigger mists if levels drop below 50% for cresteds or 40% for leopard geckos.
- Adjust based on species: for Jeter, I spike humidity to 70% at dawn and dusk to mimic natural dew cycles.
Dialing in Jeter’s system took trial and error-too much mist made him hide, but now he perches proudly after each cycle. Regularly clean misting nozzles to prevent clogs that could disrupt your gecko’s hydration routine.
Programming Your Gecko’s Daily Routine
Syncing all your devices creates a seamless environment that feels like home to your gecko. A well-programmed routine reduces stress and encourages natural behaviors, from basking to hunting. Think of it as setting up a tiny, automated ecosystem-your gecko will thank you with vibrant health and playful antics.
Here’s a sample schedule I use for my crew, tailored to their quirks:
- 6:45 AM: Lights and heat gradually ramp up (if using dimmers) or turn on-Babe, my giant day gecko, starts basking immediately like he’s clocking in for work.
- 7:00 AM – 7:00 PM: Day cycle with stable warmth; misting occurs at 7:30 AM and 6:30 PM for humidity spikes.
- 7:00 PM: Lights off, but heat may stay on if needed for nocturnal species; night-time drop in temperature begins.
- Overnight: Thermostat maintains cool-side temps, and humidity sensors keep levels steady-Mookie, the gargoyle gecko, uses this time for his acrobatic leaps between branches.
Geckos don’t care about deadlines, but they love predictability-Griffey now “poses” right when the lights come on, as if he’s got a busy day of napping planned. Sync misting with temperature changes to avoid shocking your pet; for instance, mist when temps are mild, not at peak heat.
If you have multiple species, customize routines: A-Rod prefers solitude with minimal disturbances, while Jeter enjoys gentle handling after misting. Monitoring your gecko’s behavior after programming helps you tweak schedules for their unique personalities and needs.
Safety and Maintenance for Automated Enclosures
Automation is fantastic until it fails. I learned this the hard way when a faulty timer left my gecko, Jeter, without his night-time heat drop for an entire weekend. That single event made me a zealot for safety protocols. Your gecko’s life depends on the reliability of your setup.
Always plug every device into a quality surge protector. A power surge can fry your thermostat in seconds, leading to a catastrophic overheating event. Think of a surge protector as the cheapest life insurance policy you’ll ever buy for your pet.
You must also implement fail-safes. For heating, this means using a thermostat with a built-in high-temperature alarm or even a secondary, independent thermostat set a few degrees higher as a backup shut-off. For misting systems, an optical eye sensor that prevents over-filling is a game-changer for avoiding floods.
Calibrating Sensors for Accuracy
An uncalibrated sensor is a liar you’ve invited into your home. Your fancy digital thermometer is useless if it’s reading 5 degrees too low. I calibrate all my sensors every three months without fail.
Here is the simple process I use:
- For thermometers: Use a glass of crushed ice and water. Stir it and let it sit for a minute. Your thermometer should read 32°F (0°C). Note the difference and adjust your settings accordingly.
- For hygrometers: The salt test is your best friend. Place a bottle cap of table salt dampened with a few drops of water in a small sealed container with your hygrometer. After 6-8 hours, it should read exactly 75% humidity.
This 10-minute task prevents disasters by ensuring you are reacting to real environmental data, not a faulty reading. Trust me, finding out your humidity sensor was wrong *after* your crested gecko has a bad shed is a terrible feeling.
Routine Maintenance Tasks
Automation doesn’t mean “set it and forget it.” It means “set it and check it regularly.” Here is my simple maintenance schedule.
Weekly Tasks:
- Visually inspect all cords for fraying or chew marks.
- Check that timers are functioning and haven’t been unplugged.
- Wipe down misting nozzles with a vinegar solution to prevent mineral clogs.
- Manually check temperatures and humidity with a trusted handheld device.
Monthly Tasks:
- Deep clean the water reservoir for your misting system to prevent bacterial or algal growth.
- Check and clean thermostat probes with a damp cloth.
- Test all fail-safes and alarms to ensure they still work.
- Examine heating elements for any signs of damage or hot spots.
Sticking to this checklist is the single biggest factor in keeping your automated system running smoothly for years.
Troubleshooting Common Automation Issues
Things will go wrong. It’s not a matter of *if*, but *when*. Don’t panic. Most issues have a simple fix. Here are the problems I encounter most often and how I solve them.
Problem: Timer fails to turn devices on/off.
- Solution: First, perform a hard reset by unplugging it for 30 seconds. Check the programmed schedule hasn’t been accidentally erased. If it’s a mechanical dial timer, the internal gears can sometimes stick.
Problem: Wild humidity swings.
- Solution: This is almost always a calibration issue-re-calibrate your hygrometer. If that’s not it, check for a clogged or misaligned misting nozzle that’s causing inconsistent spray patterns.
Problem: Enclosure is too cold, but the thermostat says it’s on.
- Solution: Your heating element may have died. Test it by plugging it directly into the wall (briefly and with extreme caution!). Also, check that the thermostat probe hasn’t fallen onto the cool floor or been buried under substrate.
Problem: Misting system is leaking or flooding.
- Solution: Tighten all tubing connections. The vibration from the pump can loosen them over time. Inspect the reservoir for cracks. Ensure the float valve (if you have one) isn’t stuck in the “open” position.
Having a basic toolkit handy with spare fuses, extra tubing, and a backup heat source will turn a potential crisis into a minor inconvenience.
Smart Upgrades for Your Gecko Setup
Upgrading to smart devices can feel like giving your gecko a personal assistant. I started with simple timers for my leopard gecko Griffey, but adding Wi-Fi controls let me fine-tune his environment from anywhere. Smart plugs can run lights and heat mats on schedules you set via an app. Thermostats with Wi-Fi send alerts if temperatures stray, and smart misters let you trigger humidity bursts remotely. This tech connects to systems like Google Home or Alexa for voice commands, but always prioritize reliability over flashy features.
Knowing when to upgrade depends on your routine and your gecko’s signals. Upgrade when you notice consistent humidity drops or temperature swings that manual checks miss. Beginners should master basic timers first—I waited a year before adding smart elements for my crested gecko Jeter. If you travel often or have multiple enclosures, smart devices save time and reduce human error. As your gecko grows, you’ll often need to upgrade the enclosure to keep up with its growing space and changing climate needs. Upgrading the enclosure as it grows helps you maintain stable humidity, temperature, and enrichment. Always test new gear alongside old methods to ensure a smooth transition.
- Start with plug-in timers for lights-they’re cheap and foolproof.
- Move to Wi-Fi thermostats if you need remote monitoring.
- Choose smart misters for species like gargoyle geckos that need precise humidity.
Data-logging is the unsung hero of smart upgrades. Tracking temperature and humidity trends helped me spot a nighttime chill affecting my African fat-tailed gecko A-Rod before he showed stress. These logs create a health diary, revealing patterns like seasonal changes or equipment drift. You can share this data with a vet, making diagnoses faster and more accurate. It turns guesswork into science, ensuring your gecko thrives in a stable, documented habitat.
FAQs
What is the estimated cost to fully automate a gecko enclosure?
The cost typically ranges from $50 to $200, depending on the quality and number of devices like timers, thermostats, and misters you select.
How soon after automation will I notice changes in my gecko’s behavior?
You may observe improved activity and reduced stress in your gecko within a few days to a week of consistent automation. Pair these efforts with calm techniques and environmental fixes to maximize results. A stable terrarium setup with appropriate lighting, humidity, and hiding places can help keep stressed geckos calm and responsive.
Is automation suitable for all life stages of geckos, including juveniles?
Yes, automation can be used for geckos of any age, but always adjust settings carefully to meet the specific needs of younger, more vulnerable geckos.
The Bottom Line on Gecko Automation
Getting your gecko’s habitat on a reliable schedule is simpler than it seems. Focus on the three core systems: use timers for your lights to create a consistent day/night cycle, thermostats for your heat sources to guarantee safe and stable temperatures, and automated misters to maintain that all-important humidity without daily effort. This trio of devices works together to build a stable, low-stress environment that mimics their natural rhythms.
Remember, these tools are here to support your care, not replace your observation. Technology is a fantastic helper, but you are still your gecko’s primary guardian. Keep learning, watch their behavior closely, and always be ready to tweak your setup as their needs evolve. Your thoughtful attention, combined with smart automation, is the true recipe for a thriving, happy pet.
Further Reading & Sources
- Python Keeps A Gecko Happy: Terrarium Automation With Raspberry Pi | Hackaday
- Spotted Gecko Habitat Temperature Monitor/Thermostat W/Arduino & ESP8266 ESP12 : 5 Steps (with Pictures) – Instructables
- Gecko Terrarium Kits – Gecko Habitat Kits | The Bio Dude
The Gecko Guide is your ultimate resource for gecko enthusiasts, providing expert advice and practical tips to ensure the health and happiness of your scaly companions. Alexander is a passionate gecko owner with over a decade of experience in reptile care. We are dedicated to offering accurate, up-to-date information to support your gecko journey.Our mission is to foster a community of responsible gecko owners who are passionate about the well-being of these fascinating creatures.
Heating & Temperature Control