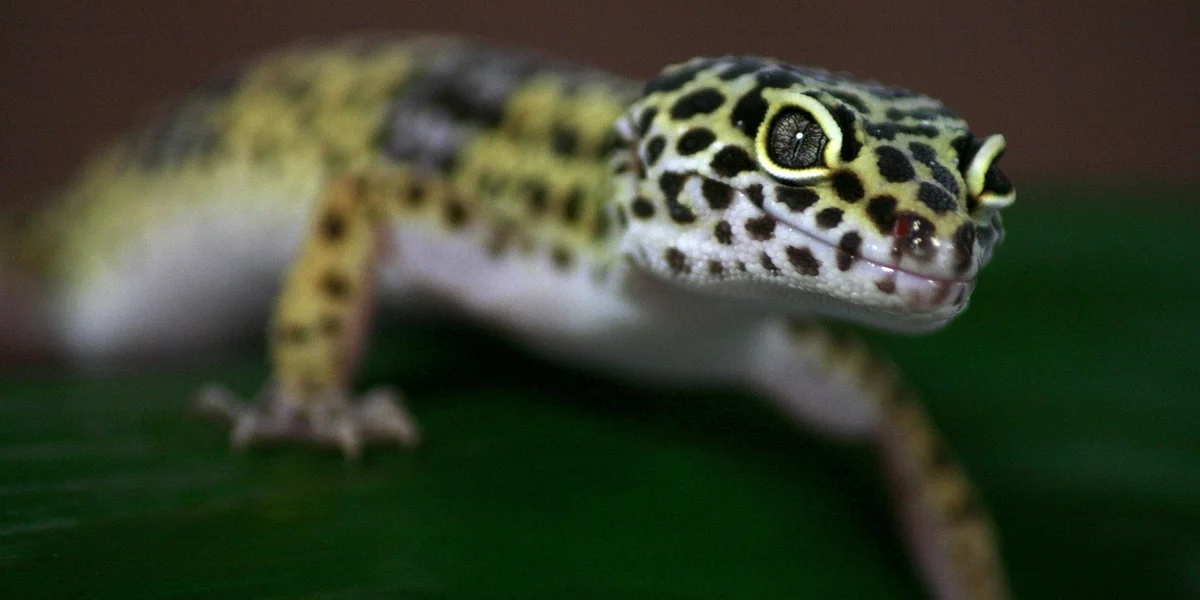
How to Create and Use Humid Hides for Leopard Geckos
Published on: June 29, 2026 | Last Updated: June 29, 2026
Written By: Alexander 'Gecko Geek' Johnson
Finding a piece of stuck shed on your leopard gecko is a stressful moment for any owner, and it often points to one missing element in their tank: a proper humid hide. I’ve been there with my own gecko, Griffey, and seeing him struggle was a quick lesson I won’t forget.
I’m going to help you get it right the first time. By the end of this guide, you will know exactly how to build and maintain the perfect humid retreat for your pet. Here are the three key things you’ll learn:
- The simple, inexpensive materials you need to build an effective hide.
- Where to place it in the enclosure for maximum use.
- How to maintain perfect moisture levels for healthy sheds.
You will get clear, step-by-step advice that works. We are covering: humid hide purpose, best materials, step-by-step setup, ideal tank placement, and maintenance routine.
Do Leopard Geckos Really Need a Humid Hide?
Yes, absolutely. In my years of keeping leopard geckos, from my energetic Griffey to my more reserved rescues, a humid hide has been the single most effective tool for preventing health issues. Think of it as a dedicated, on-demand spa room that your gecko can use whenever they feel the need. It’s not just a luxury; it’s a cornerstone of preventative care.
How Humid Hides Prevent Shedding Problems
Leopard geckos shed their skin in large pieces as they grow. Without enough humidity, that old skin dries out and sticks. I’ve seen the consequences of this firsthand—it’s not pretty. Understanding shedding problems helps you spot trouble early and take the right steps to keep your gecko healthy. If you notice retained shed or repeated difficulties, consult a reptile vet or experienced keeper for guidance.
Stuck shed, especially on delicate toes and the tip of the tail, can constrict blood flow. This can lead to the loss of toes or even a portion of the tail. A proper humid hide provides the moisture that softens the old skin, allowing it to slide off in one clean, satisfying piece. You’ll often find the entire shed skin balled up inside the hide after a successful session.
- Softens the old skin for an easy, complete shed.
- Prevents dangerous constriction on toes and tail tips.
- Reduces the need for stressful, human-assisted shedding.
Benefits for Hydration and Egg-Laying
The benefits go far beyond just shedding. The moist environment offers a secondary source of hydration through the skin. Geckos will sometimes just sit in the humid hide to rehydrate, absorbing moisture in a way we don’t often see. This is a reminder that proper humidity management is crucial. It ties directly into the topic of the 8 biggest mistakes in gecko hydration humidity control.
For female geckos, it’s absolutely critical. A gravid (egg-carrying) female will instinctively seek out a moist, secure place to lay her eggs, whether they are fertile or not. Without a suitable humid hide, she can become egg-bound, a life-threatening condition where she cannot lay her eggs. Providing this space is a direct act of responsible animal welfare.
Step-by-Step Guide to Building a DIY Humid Hide
You don’t need to buy an expensive product. I’ve made most of my hides, and my geckos love them. It’s simple, cheap, and takes about five minutes.
Essential Materials for Your Humid Hide
You only need a few safe, easy-to-find items. I keep a stash of these in my gecko-care kit.
- A Container: A small, opaque plastic food container with a lid (like a Tupperware). The opaque walls make it feel secure.
- A Doorway: A pair of scissors to cut a smooth-edged entrance hole.
- Moisture-Retaining Substrate: Sphagnum moss, peat moss, or even moist paper towels. I prefer sphagnum moss for its texture and moisture retention.
- Water: Dechlorinated water, the same kind you’d put in their water dish.
Assembling Your Hide: A Simple Process
- Create the Entrance: Turn your plastic container upside down. Use your scissors to cut a generous, arch-shaped doorway in one side. Make sure the edges are smooth so your gecko doesn’t get scratched.
- Prepare the Substrate: Take a handful of your chosen moss and soak it in dechlorinated water. Squeeze it out firmly until it is damp, not dripping wet. A soggy hide can lead to scale rot, so a good squeeze is vital.
- Assemble and Place: Place the damp moss inside the hide, spreading it evenly across the floor. Put the lid on the container and place the entire hide on the warm side of your gecko’s enclosure. The gentle heat from the undertank heater will help create a lovely, humid microclimate inside.
Setting Up the Humid Hide in Your Terrarium
Ideal Placement for Humidity and Comfort
Where you put the humid hide is just as important as the hide itself. You want to create a spa-like retreat, not a damp closet. The absolute best spot is on the warm end of the terrarium, partially over the undertank heater. The gentle heat helps water evaporate from the substrate, creating that perfect, steamy environment your gecko needs for shedding.
I always place Griffey’s humid hide in his warm corner. He consistently chooses it over a cooler one, showing me he prefers the warmed humidity. But it shouldn’t be in the absolute hottest spot. Position it so one side is warmer and the other is slightly cooler, giving your gecko a choice.
Ensure the hide feels secure and dark. A cramped, fully-enclosed space is what they instinctively seek out when they feel vulnerable during a shed. If the hide is too open or bright, your gecko will likely avoid it, defeating the whole purpose.
Maintaining Proper Moisture Levels
Getting the moisture right is a tactile skill you’ll quickly master. The goal is damp, not wet. Think of the moisture level of a wrung-out sponge.
Here is my simple routine for checking and adding moisture:
- Stick a finger into the substrate, down to the bottom.
- If it feels dry or just slightly cool, it’s time to add water.
- Pour a small amount of dechlorinated water onto one corner of the substrate.
- Mix it gently with your fingers to distribute the moisture evenly.
Avoid spraying the walls of the hide directly, as this can create dripping water and make the interior too soggy. I check the moisture levels every other day, as the heat lamp and low humidity in my home can dry it out surprisingly fast. During a shed, I might check it daily to ensure it’s absolutely perfect for my guy.
Keeping Your Humid Hide Clean and Problem-Free
Routine Cleaning and Substrate Replacement
A clean hide is a healthy hide. A dirty one can become a breeding ground for bacteria and mold, which is the last thing your gecko needs when its skin is sensitive. Make sure to regularly spot clean your gecko’s enclosure to maintain overall hygiene.
I follow a strict cleaning schedule to keep everything fresh:
- Spot Clean Daily: Remove any visible feces or urates as soon as you see them.
- Full Substrate Change Weekly: Every week, I take out all the old sphagnum moss or paper towels. I scrub the hide itself with a reptile-safe disinfectant, rinse it thoroughly, and put in brand new substrate.
This weekly reset prevents any nasty surprises and gives you a chance to inspect the hide for any damage or wear. This simple weekly habit is one of the easiest ways to prevent skin infections and respiratory issues in your pet.
Fixing Common Humid Hide Issues
Even with the best setup, you might run into a couple of hiccups. Here’s how to solve the most frequent problems.
Problem: The hide is growing mold.
Solution: Mold means it’s too wet and lacks ventilation. Immediately replace all the substrate. Before putting in new moss, try squeezing out even more water. You can also drill a few small extra air holes in the hide or switch to a more breathable material like paper towels for a while.
Problem: Your gecko is never using the hide.
Solution: First, check the location and security. Is it too exposed? Is it on the cold side? Move it to the warm end. If that doesn’t work, try a different style of hide; some geckos prefer a flatter, tighter entry than others. My gecko Jeter ignored his first humid hide until I swapped it for one with a smaller doorway. Also, ensure that your enclosure is safe, as geckos will avoid areas where they feel threatened or insecure.
Problem: The substrate dries out in just a few hours.
Solution: This usually points to low overall humidity in the room or too much heat directly on the hide. Try moving the hide slightly away from the direct heat source and make sure you are using a substrate that holds moisture well, like sphagnum moss. You can also place a small water dish near the terrarium’s heat source to boost ambient humidity.
DIY vs. Store-Bought Humid Hides: What’s Best?
Choosing a hide isn’t just about looks; it’s about function, safety, and your gecko’s comfort. I’ve used both DIY and store-bought options for my crew, and each has a perfect time and place in your gecko-care toolkit. If your gecko hides all the time, a quick troubleshooting checklist can help you pinpoint the cause. Common culprits include temperature, lighting, humidity, and hide placement. Let’s break down the pros and cons so you can make the best choice for your setup.
When to Go the DIY Route
Creating your own humid hide is incredibly satisfying and often the most practical choice. I built Griffey’s first humid hide from a repurposed plastic food container, and he used it for years.
- Cost-Effective: You can create a fully functional hide for just a few dollars using items you might already have at home.
- Fully Customizable: Need a specific entrance size or internal shape? With DIY, you are the designer.
- Immediate Solution: Perfect for emergencies, like a sudden shed, when you can’t wait for shipping.
- Beginner-Friendly: It’s a low-risk way to learn about your gecko’s humidity preferences without a big financial commitment.
The best DIY hides start with a sturdy, smooth-edged container like a small plastic tub or a rinsed-out yogurt cup. Just cut a hole for an entrance and sand the edges until they are completely smooth to protect your gecko’s delicate belly scales. Make sure it fulfills the purpose of a suitable gecko hide for your pet’s needs.
Considering Pre-Made Humid Hides
Store-bought hides offer a polished look and are built to last. My gecko Jeter has a beautiful ceramic one that doubles as a basking spot.
- Durability: Materials like resin, ceramic, and stoneware are easy to clean and withstand years of use.
- Aesthetic Appeal: They come in designs that mimic natural rock formations or logs, seamlessly blending into your terrarium’s theme.
- Optimized Design: Many are crafted with ideal geometry to trap humidity effectively without ventilation issues.
- Convenience: It’s a ready-to-use solution-no crafting or tool-safety required.
I recommend pre-made hides for keepers who want a permanent, attractive fixture or for those with multiple tanks, as the consistency is a huge time-saver. Just ensure the entrance isn’t too rough and the internal space feels secure and enclosed.
Tailoring Humid Hides for Different Leopard Gecko Needs
One size does not fit all in the gecko world. A hatchling’s needs are vastly different from a gravid female’s, and your hide setup should reflect that intelligent, compassionate care. Observing your gecko’s behavior will tell you everything you need to know about how well your hide is working.
Hides for Hatchlings and Growing Geckos
Young geckos are tiny, fast, and can feel exposed in a large space. Their hides must make them feel utterly secure. Sometimes, a terrarium that’s too small can cause stress. Signs your geckos’ terrarium is too small include constant pacing, crowding at the hides, and reluctance to explore.
- Size Appropriately: The hide should be just spacious enough for the gecko to turn around comfortably. Too much empty space feels unsafe.
- Low Entrance: Ensure the entrance is low to the substrate to prevent bedding from spilling in and to make access easy for little legs.
- Lightweight DIY: A small plastic film canister or condiment cup is perfect. They are easy for a small gecko to move and feel in control of.
- Check Frequently: Juveniles grow quickly! You may need to size up their humid hide every few months to ensure it doesn’t become too cramped.
I’ve found that hatchlings often prefer the snug, dark confines of a simple, small DIY hide-it mimics the safety of a burrow and reduces stress during their frequent sheds.
Special Care for Gravid Females
A gravid (egg-carrying) female has one primary job: find a safe, humid, and secure place to lay her eggs. Her humid hide becomes a potential nesting site.
- Ample Floor Space: She needs a hide with a larger footprint, giving her room to dig and position herself for laying.
- Deep, Diggable Substrate: Fill the hide with a deeper layer (3-4 inches) of slightly damp sphagnum moss, coco fiber, or a peat mix that holds a burrow’s shape.
- Complete Privacy: Place the hide in the terrarium’s quietest corner. Avoid frequently moving or disturbing it once you suspect she is gravid.
- Multiple Options: Some breeders offer a second, slightly different humid hide to give the female a choice. This can prevent egg-binding by reducing stress.
Watching a gravid female meticulously dig and prepare her nest in a hide you tailored for her is one of the most rewarding experiences in reptile keeping. It’s a direct result of you providing exactly what she needs to succeed.
FAQs
Can I buy leopard gecko hides on Amazon?
Yes, Amazon offers a wide range of leopard gecko hides, including pre-made humid hides from various reptile brands.
Does Petsmart sell humid hides for leopard geckos?
Petsmart typically carries reptile hides that can be used as humid hides, often found in their pet care accessories section.
How many humid hides fit in a 20-gallon tank?
You can comfortably fit one or two humid hides in a 20-gallon tank, ensuring they are placed on the warm end for optimal humidity.
Is it normal for my leopard gecko to stay in the hide all day?
It is common for leopard geckos to hide frequently, but constant hiding may indicate stress or an issue with the enclosure setup. If your leopard gecko always hides, you may be wondering why. Checking temperature, humidity, hiding spots, and handling routine can help identify the cause.
Can I 3D print a leopard gecko hide?
Yes, you can 3D print a safe and custom leopard gecko hide using non-toxic, reptile-friendly filaments for a personalized design.
Your Gecko’s Perfect Humid Hide
Providing a humid hide is one of the simplest and most impactful things you can do for your leopard gecko’s health. You just need a small, enclosed container with a hole, filled with damp sphagnum moss or paper towels, and placed on the warm side of the enclosure. This setup gives your gecko the moist retreat it needs to shed its skin completely and comfortably, preventing serious health issues. If you’re handy, you can also make a DIY humid hide: a small plastic container with a lid can be converted into a snug moisture retreat. Customize the size and placement to fit your tank and gecko’s needs.
Creating this hide is a small act that reflects a much larger commitment. Caring for a gecko is a continuous journey of learning and observation, and staying informed is the truest form of responsible pet ownership. Your attention to details like this humid hide shows you’re on the right path to giving your scaly friend a fantastic life.
Further Reading & Sources
- Where should I place my humid hide in my leopard gecko’s …
- Humid Hide for Leopard Gecko
- Strawberry Red Leopard Gecko humid hide – Geeky Gecko Creations
The Gecko Guide is your ultimate resource for gecko enthusiasts, providing expert advice and practical tips to ensure the health and happiness of your scaly companions. Alexander is a passionate gecko owner with over a decade of experience in reptile care. We are dedicated to offering accurate, up-to-date information to support your gecko journey.Our mission is to foster a community of responsible gecko owners who are passionate about the well-being of these fascinating creatures.
Humidity Control